
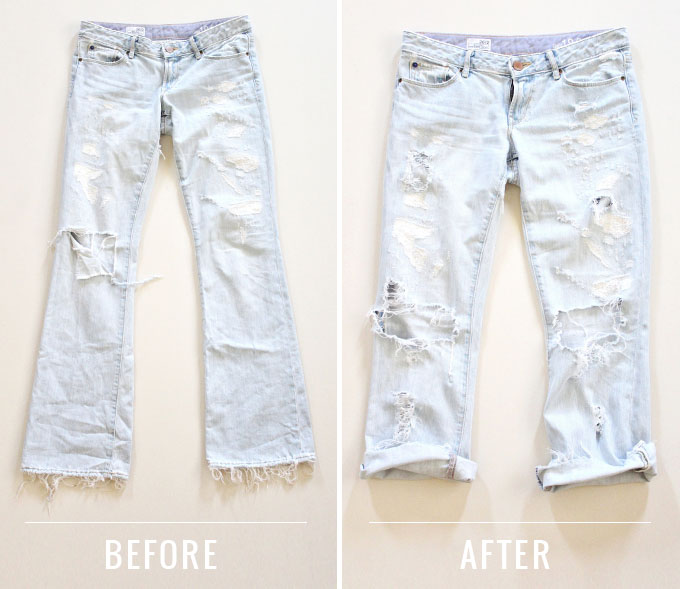
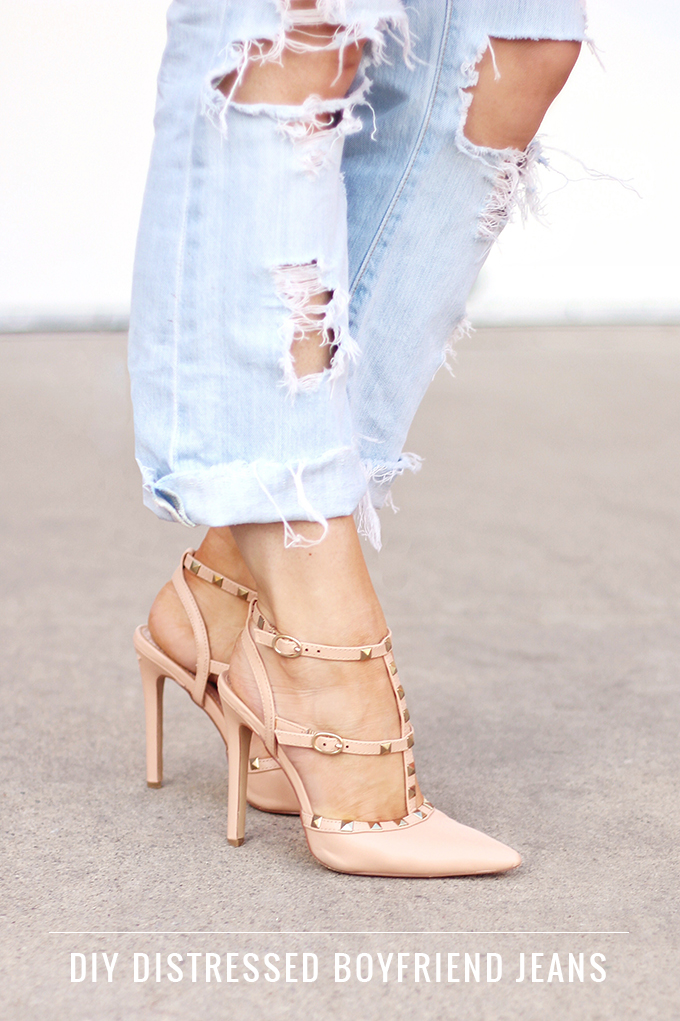
Feeling crafty this weekend? Today I’m showing you how to rough up a pair of denim to achieve the distressed look we’re seeing everywhere this spring! The best part about distressing a pair of jeans you currently own is the denim is already perfectly worn in — and you can totally customize it to your preference! I’ve owned this pair of jeans for about 6 years, but they’re a little too short for me to wear with heels, so I figured I’d get a lot more wear out of them if I distressed them and cropped them a bit. Voila — now I have the perfect pair of spring boyfriends, and I’ve been wearing them constantly! You only need about an hour and a few tools to complete this DIY (and you probably have the tools at home)! Stay tuned for an easy, illustrated, step-by-step guide to creating a distressed pair of boyfriend jeans yourself.
Selecting your denim

The best part about this project is that it costs $0.00 if you use a pair of denim you already own (plus it’s sustainable!)! I chose a light, uniform wash — but I’ve also distressed a darker pair of denim (check out this fashion post to see how that looks). If you’re going for a true boyfriend look, choose a pair that has a more relaxed fit. Going shopping? Hit a local thrift store (or the Joe Fresh clearance rack!) and grab a pair in a wash you like that are 1-3 sizes larger than you’d usually wear. I personally find the most flattering fit to be more roomy than my skinny jeans, but not totally oversized so they’re still a bit form-fitting in the bum (saggy bum is not cute!). Experiment and see what style you like best on yourself! You can also distress a pair of skinny jeans, or any other denim garment by following these steps.
DIY | DISTRESSED BOYFRIEND JEANS
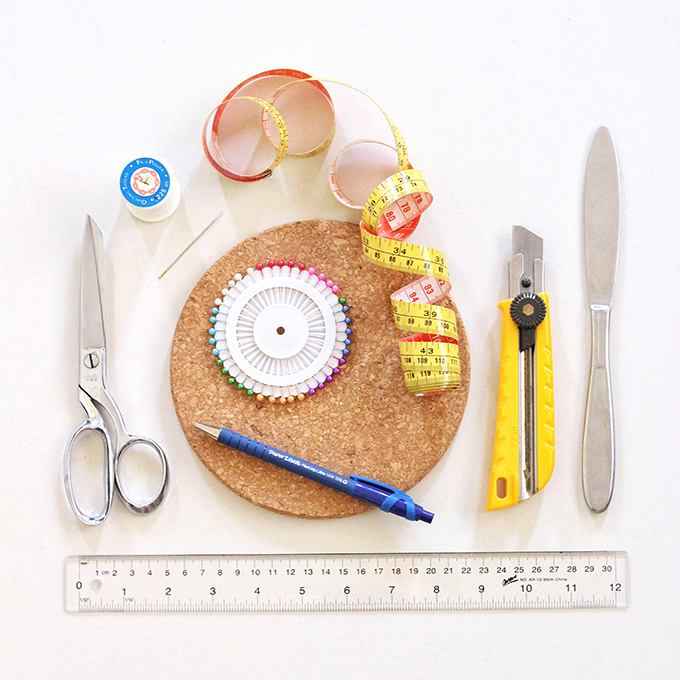
Materials
• Pair of denim
• Sharp scissors
• Exact-o knife
• Butter knife
• Ruler or measuring tape
• Pen
• Cork hot pad
• Reference photo*
* Find a photo of distressed boyfriends that you like and keep it pulled up on your phone for reference while you work. It always helps my process if I know what look I’m aiming for!
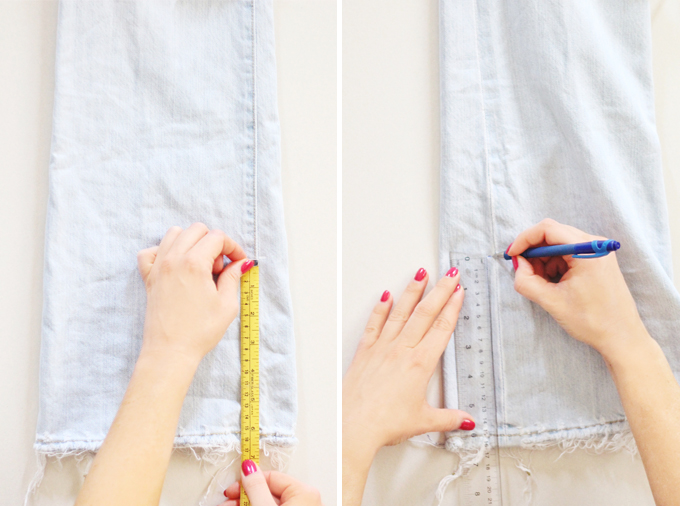
STEP 1 | CROP
First, try the jeans on and fold them up to where you want the hem to sit. Mark the spot with a pen on one leg.
Measure from the bottom hem to the spot you marked. Then, mark that spot on the other leg.
Measure and mark the spot on each seam, and in the centre of each leg. Then, connect the dots to form a cutting guide. Cut along the guide to crop both legs evenly.
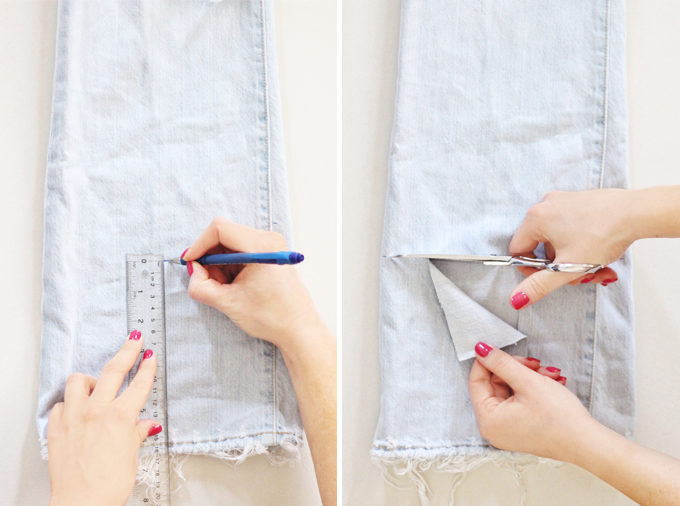
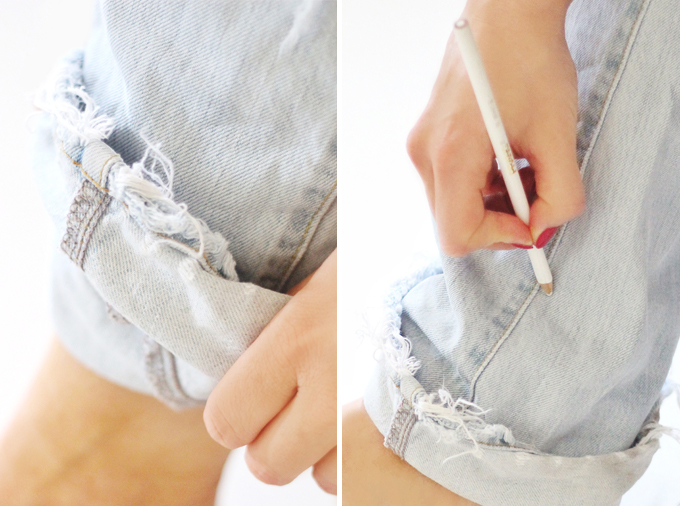
Fray the bottoms with a butter knife by dragging it horizontally across the cut edges. Slide the cork hot pad up the leg of the denim to protect the surface underneath.
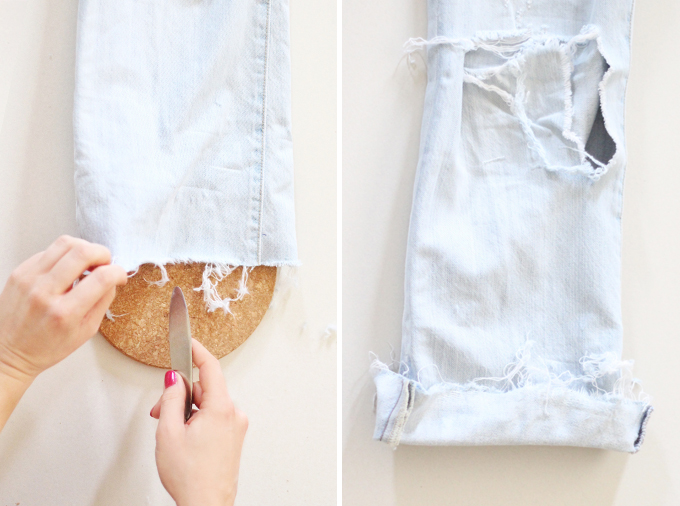
STEP 2 | BUST THE KNEES
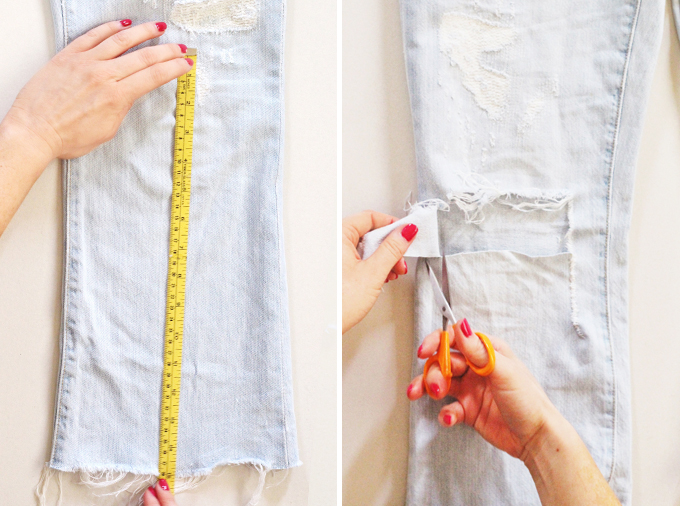
Try the jeans on again and mark the spot on your knee where you want the rip to start. Before you start cutting, measure up from the hem to the identical point on the other leg. I wanted really big rips and totally busted knees, so I measured out a rectangle, then cut it out with scissors. Whatever you decide to do at the knee, repeat on the other side.
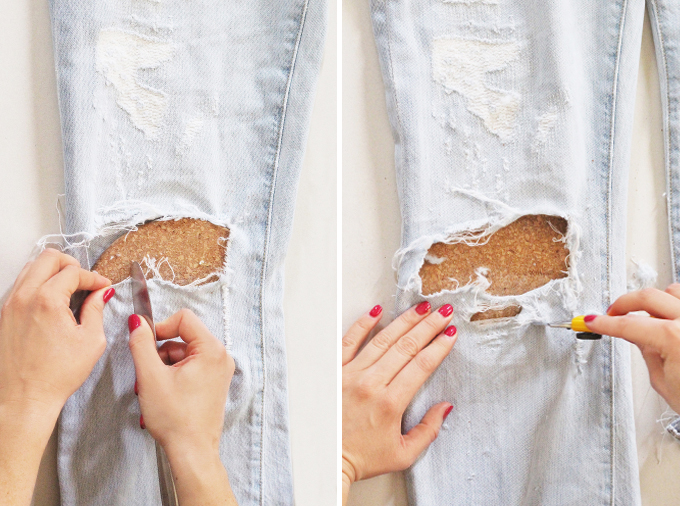
STEP 3 | ROUGH THEM UP
Time to add texture! First, start by sliding the cork hot pad up the leg that you’ll be working on to avoid slicing through to the back of the denim. Distress the edges of your busted knees by dragging the butter knife horizontally across them to add frayed texture. After that’s looking good, you can also score the denim horizontally with the Exact-o knife to create smaller holes and tears. Then drag a butter knife across the scores to fray, distress and open holes. Repeat as necessary.
I personally like an asymmetrical look to my distressed denim, but now’s the time to experiment and customize each busted knee! Keep your reference photo handy as you’re working. If you’re not sure if you’ve done enough, stop and try them on — then adjust accordingly. Don’t be afraid to really get in there! Denim is a durable fabric that can handle a lot of force and pressure.
STEP 4 | ADD TEXTURE, EXAMINE & ADJUST
Try the jeans on to see where else you’d like to add smaller rips. I added some on the thighs and some below the knee rips. Again, repeat the steps above for small rips by scoring the denim horizontally with an Exact-o knife first, then dragging a butter knife across the scores to open the holes up and add frayed texture.
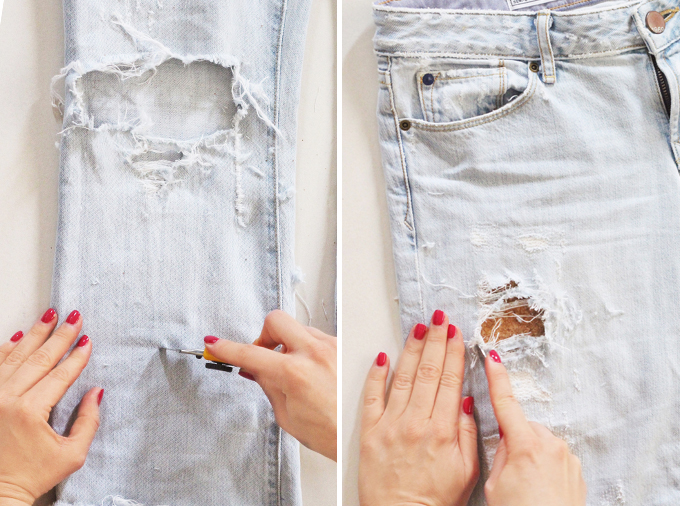
Try them on again and see where you’d like to add smaller bits of texture. I saw a few spots that I’d like a little rougher, and also went back to a few spots I’d completed earlier in the process to adjust them. Use the Exact-o and butter knives as mentioned above to make your adjustments.
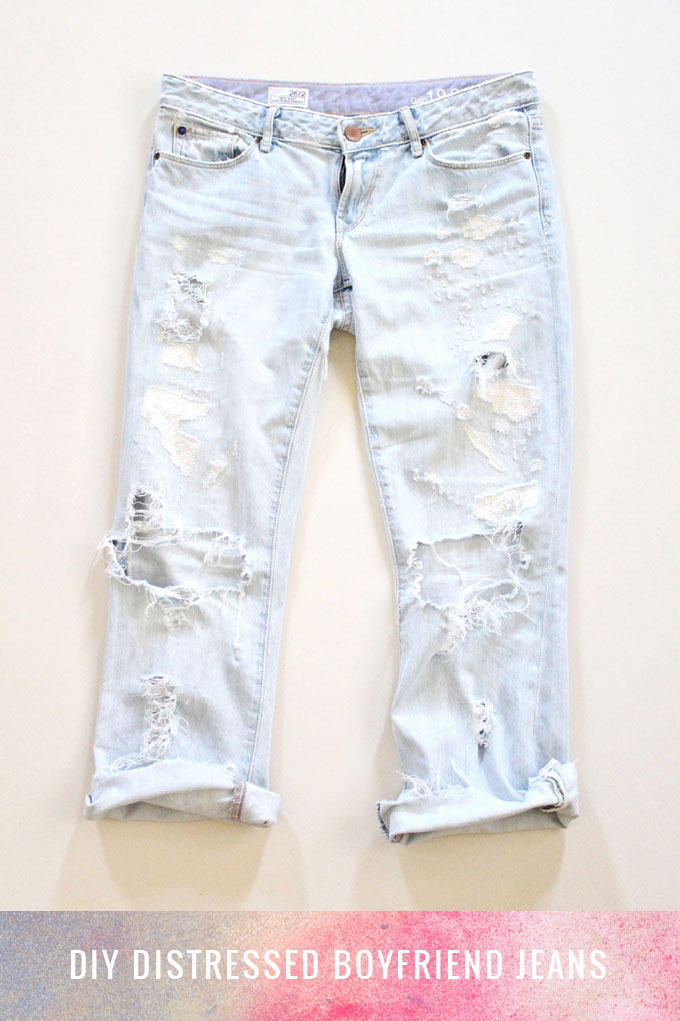
VOLIA! A CUSTOM PAIR OF DISTRESSED BOYFRIEND JEANS
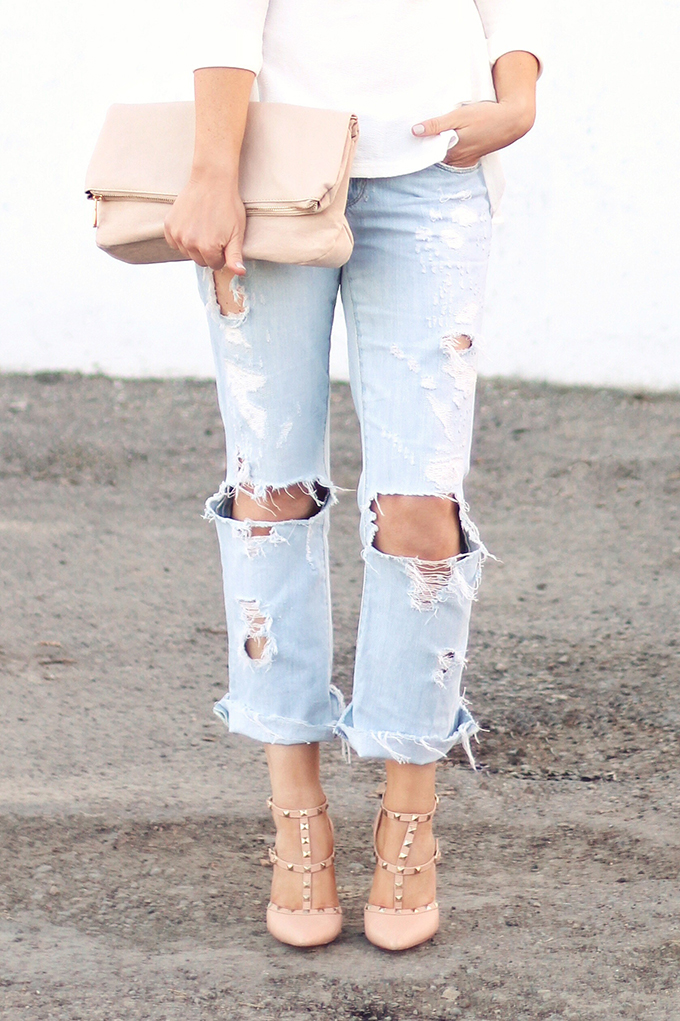
I’m also wearing
Ruffled Top* | Arrow Ring | Foldover Blush Clutch | Shoes, Shoes, Shoes, Flat Version**
* If you order from SheIn, make sure to reference the size charts on each garment against your own measurements before placing an order. This top is a medium and it fits perfectly, but I usually wear a small / extra small. I was really impressed with the quality of their clothing though, plus they have lots of unique items and shipping was pretty quick!
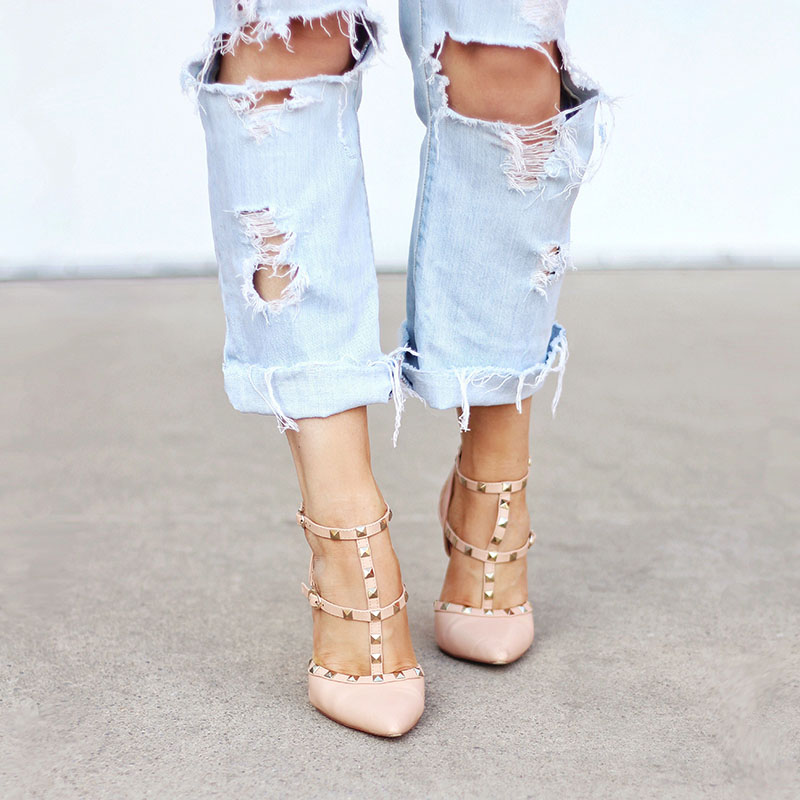
** Nope, those aren’t real Valentino Rockstuds. I’ve owned several pairs of this shoe in various colours for a few years — and I was totally oblivious to the fact that they were modeled after a designer pair when I purchased them. I just saw them pop up at either Lulu*s or Go Jane (which are my favourite online sources for inexpensive, quality shoes) and thought they were cool so I grabbed them. Honestly even if I was a millionaire, I still wouldn’t purchase anything designer — it’s just not who I am. I’ve refused to wear visible logos for as long as I can remember. So, I’ve linked the real deals at the beginning of this paragraph, but also included links to more inexpensive options up top (like the ones I’m wearing) so you can get the look for less. You do you! I still wear each pair I own often. I feel like the design is pretty timeless (and versatile) — they add a bit of an edge and sophistication to my outfits. I especially love them with ripped denim!
STILL FEELING CRAFTY? MORE DIY PROJECTS
Mistletoe-Inspired Wine Charms
Personalized Wooden Kitchen Utensil Party Favours
Driftwood Sculpture Centrepice
If you guys make a pair of distressed denim, I’d love it if you leave a comment or tag me on social media! Hit me up on Instagram, Twitter or Facebook, or use the hashtag #justinecelinadiys in your projects so I can find them! I also have a DIY board on Pinterest if you’re looking for some more crafty inspiration. Let me know if there are any other DIY’s you’d like to see me put my spin on — and enjoy the rest of your weekend!
Disclaimer: This post is not sponsored, and contains my genuine thoughts, recommendations and ideas. JustineCelina uses affiliate and referral links, which allow me to receive a small commission when you make a purchase through one of my links. Your purchases help to support JustineCelina.com!
7 Comments
[…] for $9.94 and I busted the knees myself! If you’re curious about how I did it, hop over to my DIY | Distressed Boyfriend Jeans post for an illustrated, step-by-step guide. Honestly it’s super easy to do yourself (and it […]
[…] style of pant is to pair it with a heel — either a pointy toed pump (like I’ve done here), or a sleek sandal like I’m wearing in these photos. A great pair of heels with sleek lines […]
[…] V-Neck Tunic Tee | Faux Stone Longline Necklace | Low Rise Medium Wash Jegging (I distressed them myself!) | Vans Chauffette in Tan/White c/o Union Jack Boots* | Colourpop Lippie Pencil in Polite Society […]
[…] here and here. If you’re looking to bust the knees or distress denim this fall, I have a step-by-step illustrated tutorial about how I do it (I promise it’s […]
[…] been distressing my own denim to customize it for as long as I can remember (I even have a DIY | Distressed Boyfriend Jeans tutorial!), so when I saw that novelty denim was trending into autumn and winter, I look matters […]
[…] with tons of shoppable links at every price point, plus tips on how to distress your own denim (I DIY’ed this pair […]
[…] DIY | Distressed Boyfriend Jeans […]