I’m riding that just-back-from-vacation-and-feeling-so-inspired wave and coming at you today with a fresh, completely impromptu DIY post! During our recent getaway, our Kootenay cabin was perched on the most beautiful beach with troves of driftwood washed up on shore — and I finally found the perfect piece to complete the large macrame wall hanging I’ve been planning since winter! Immediately after arriving home on Saturday, I got to work on this Modern Driftwood Macrame Wall Hanging, modelling it after the original I created for our refreshed Living Room (which has become one of my most popular DIYs!). Since I was enjoying a little staycation last weekend (I didn’t open my computer or socials for one whole week and it was just what I needed!) I wasn’t actually planning to share this post here at JustineCelina, but after snapping a few process photos over on Insta Stories I was flooded with DMs and questions about how exactly I made it. And here we are!
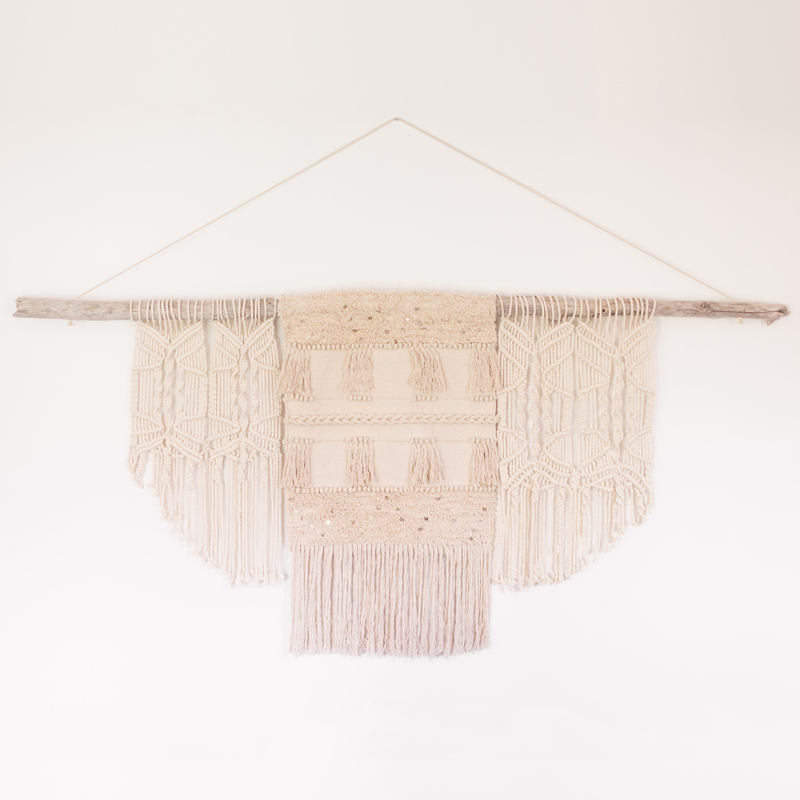
You may be surprised to learn this oversized macrame wall hanging is actually quite a simple and inexpensive project. The materials to create this 7′ x 3.5′ modern wall hanging cost a whopping $66 and it took me a few hours from start to finish, including installation. If you’re curious about how I pulled it off, you’re in luck — this post contains step-by-step, visual instructions showing you exactly how I made this bohemian beauty! If you’re looking for a fun weekend project to adorn the walls of your home or for a unique gift idea (a friend of mine created one for a baby shower!) pour yourself a cup of coffee, pull up a seat at my Dining Room table and let’s get crafty!
DIY | MODERN DRIFTWOOD MACRAME WALL HANGING
 I absolutely love to collect keepsakes from my trips and travels to display in our home. I think that’s what makes all the driftwood I’ve foraged over the years so meaningful — most of it discovered on weekend trips to the mountains, or during girls trips to Kootenay Lake! Each piece has a story and evokes wonderful memories of time spent with friends and loved ones adventuring all over this beautiful country of ours.
Sourcing Materials & Project Planning
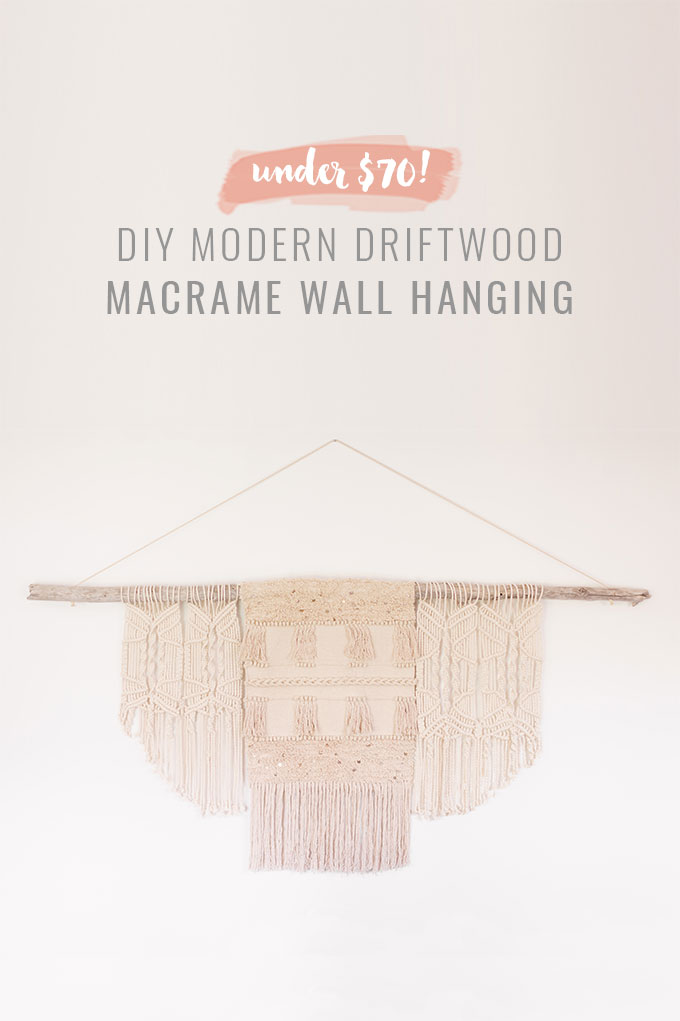 Driftwood has an organic, earthy quality that works to help tie all the greige accents in our space together. It’s also extremely lightweight and easy to drill through, making it a perfect candidate for large wall hangings to dangle from!

If you live near a large lake or river, I suggest taking a day trip to forage for driftwood — just ensure the piece you select is relatively straight, slim and completely dried out. When gauging size, keep in mind you’ll need to calculate the width of all the macrame pieces you’ll be amalgamating, plus a minimum of 6″ of space on either side of your macrame to account for mounting (as you don’t want to drill too close to the ends and split it!).

Sourcing the materials for this project will likely be the most time consuming task. I found 3 smaller wall hangings at HomeSense (one of my favourite places to shop for home decor!) and they always have an abundant selection — it’s also where I’ve found every other wall hanging in our apartment! The size of the finished wall hanging you’d like to create will determine the number of smaller macrame wall hangings you’ll need to source. Keep in mind you’ll be deconstructing and reassembling them, so consider damaged clearance items (if you think they can be salvaged) to cut project costs!
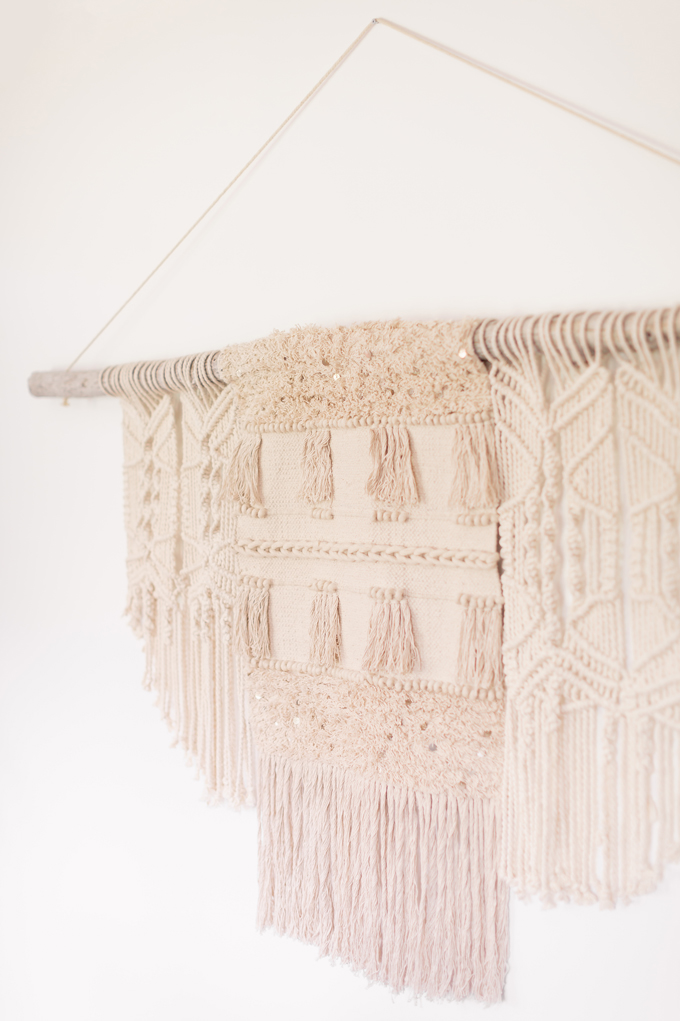
I spotted the middle piece first. It reminded me of a Moroccan wedding blanket and at just $34.99 it was love at first sight! Since this piece itself is quite large (it’s 2′ w x 3.5′ H), I knew this wall hanging would end up larger than the original I created for the Living Room. I’d suggest looking for the middle piece first so you can more easily determine which secondary pieces will compliment it to finish the wall hanging.
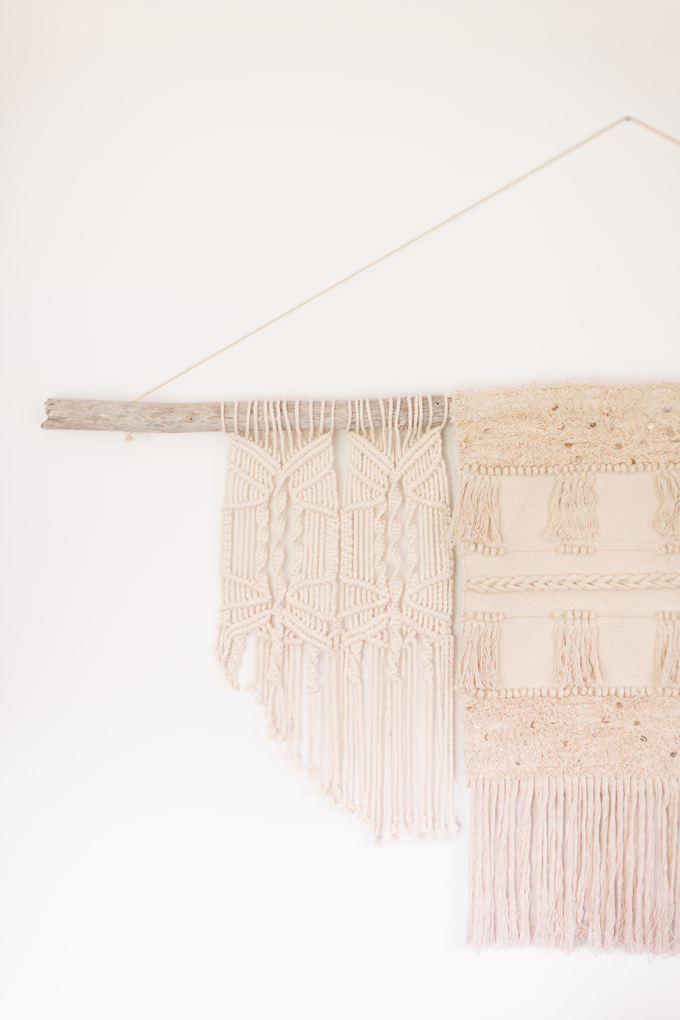
After I had my centre hanging, I could begin to visualize what the piece would actually look like and what other pieces would work alongside it. I looked for other macrame wall hangings similar in length that were neutral in colour and that I could detach from their wooden rails easily. I ended up finding 2 identical pieces in clearance section for $16 that were similar in length to my centre piece. I snapped them up right away!
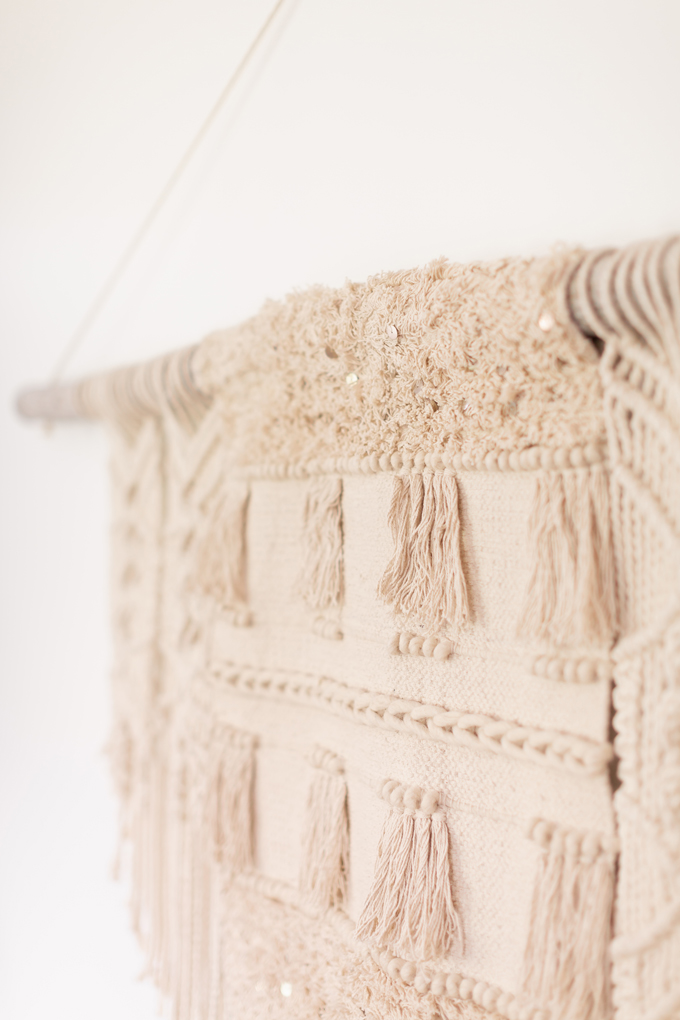
Once you’ve sourced 3 wall hangings and a relatively straight, sturdy piece of driftwood, all you need are a handful of materials and a few hours to create a Modern Driftwood Macrame Wall Hanging of your own!
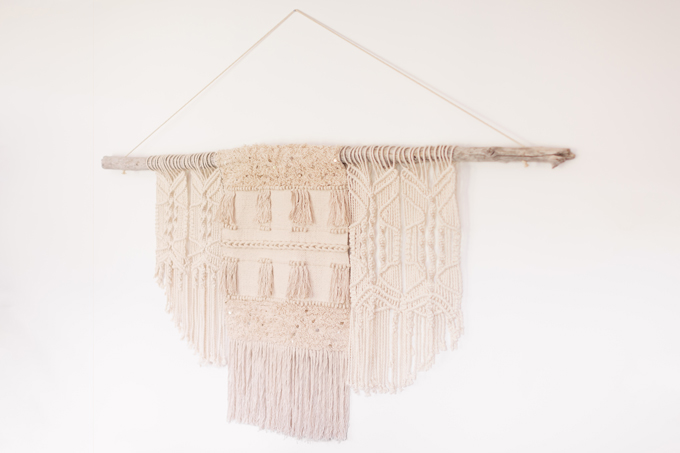
Modern Macrame Wall Hanging Tutorial Materials
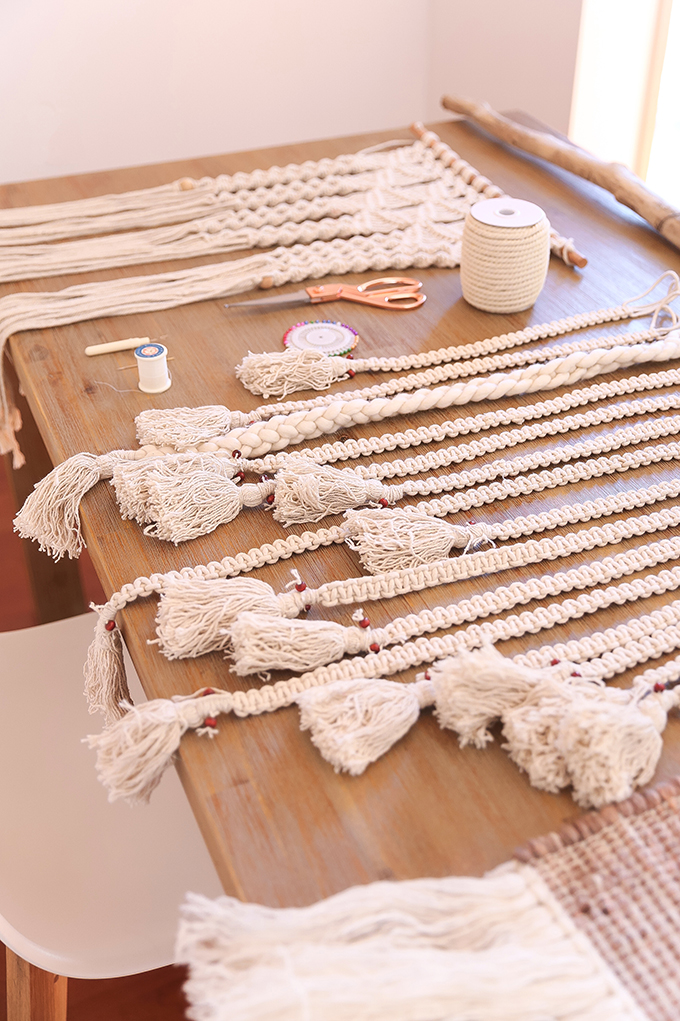
• Large piece of driftwood
• 3+ macrame wall hangings of similar heights and varying textures
• Seam ripper
• Craft scissors
• Needle and thread
• Power drill
• Drill bit (should be similar in diameter to your cord)
• Macrame cord
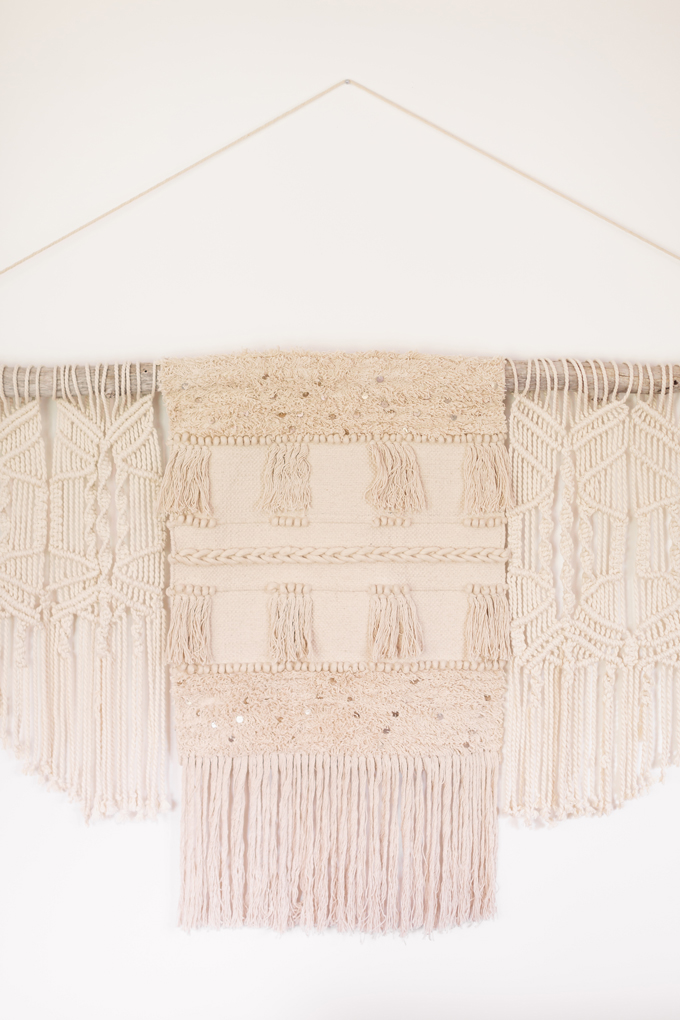
Modern Macrame Wall Hanging Step-by-Step Tutorial
Since every wall hanging will be unique depending on the smaller pieces you source, you may need to take different steps to achieve your desired result. Today I’m going to walk you through my process — yours should be similar if you have similar materials!
Note: I wasn’t planning to share this post, so I didn’t take process photos on my professional camera. Instead, I’ve repurposed process photos from my original DIY | Large Driftwood Macrame Wall Hanging post — so if the wall hangings in these step-by-step instructions look a bit different, that’s why! Rest assured, the process is nearly identitcal. If you want a BTS look at how I created this exact piece, you can catch the iPhone version in my DIY Highlight over on Insta Stories!
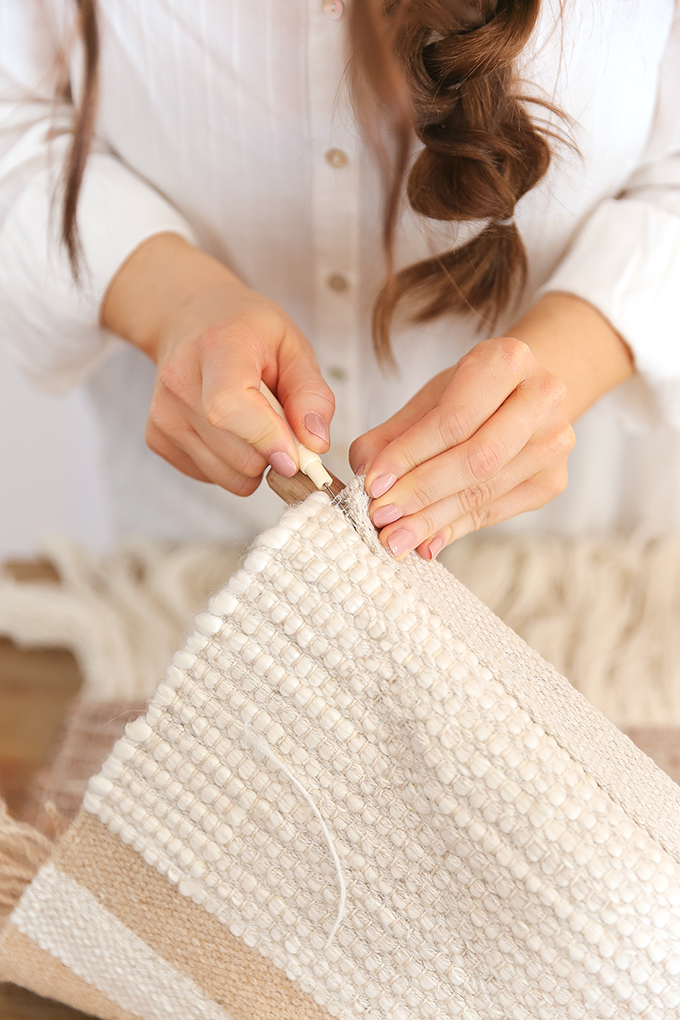
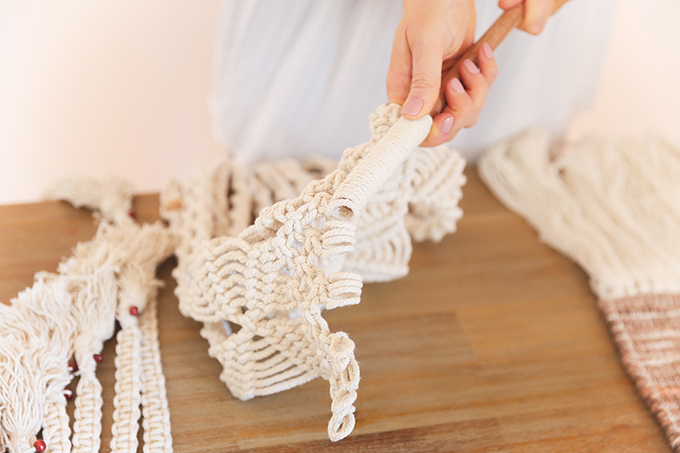
1. Remove wall hangings from their wooden dowels, by ripping the seams and cutting the cords used to hang each piece.
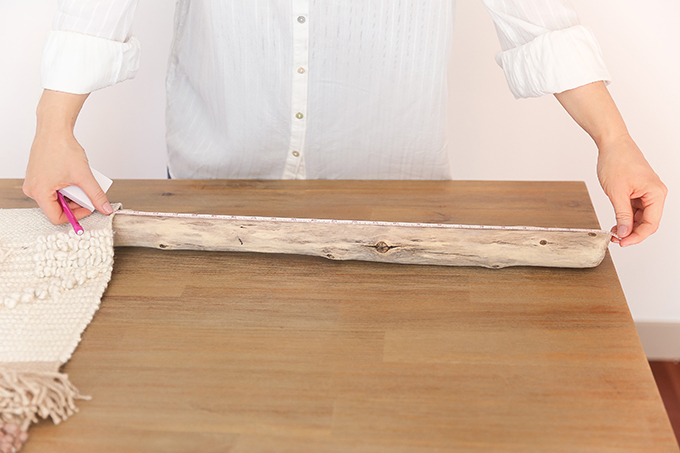
2. Measure the length of your driftwood and the width of your centre macrame piece to determine the overall centre.
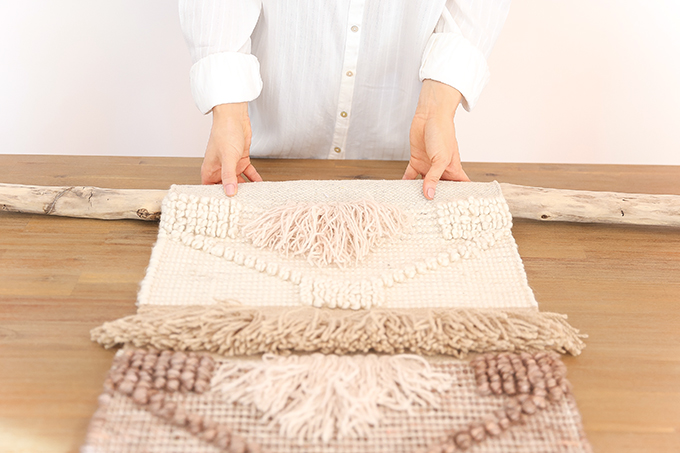
3. Position the centre macrame piece in the centre of your driftwood, double checking my measurements on both sides.
Note: If you’re a little off that’s okay, you’ll be able to slide the wall hangings around once you’ve fasteneed them to the driftwood!
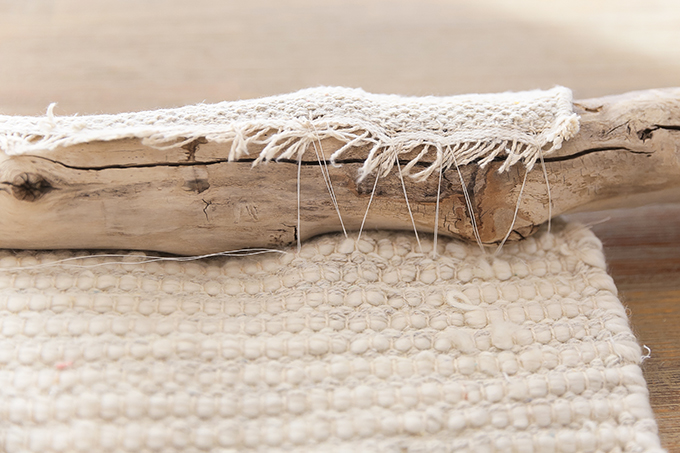
4. Stitch any macrame pieces with solid fabric tops onto the centre of your driftwood.
5. Repeat Step 1 on the secondary macrame wall hangings you’ll be adding to each side.
6. Unravel the macrame loops at the top of the piece to ensure they’re large enough to slide over the driftwood.
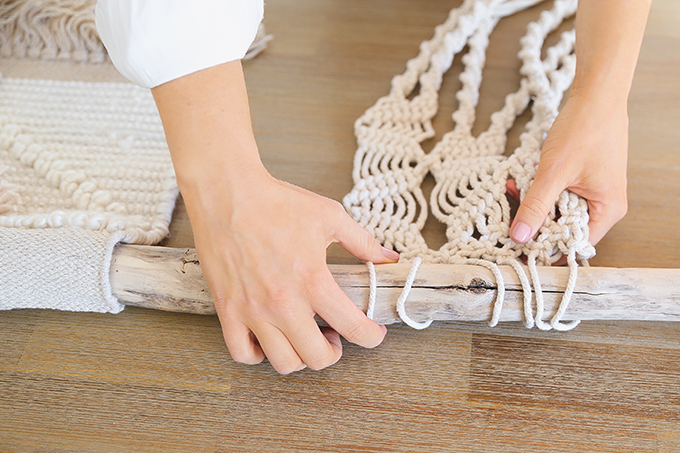
7. Slide both pieces onto the driftwood, on either side of the centre piece.
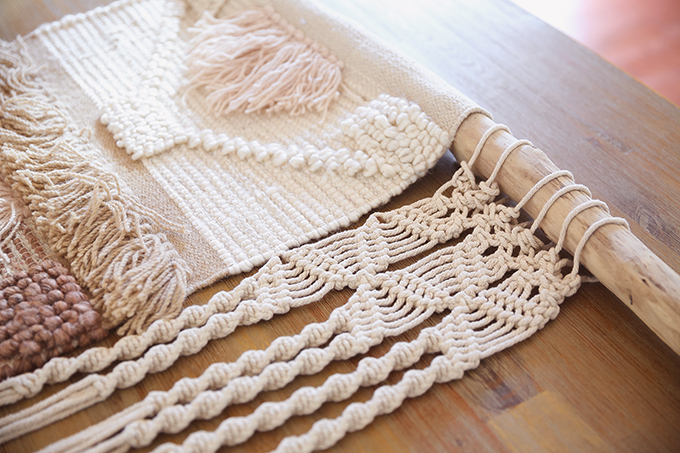
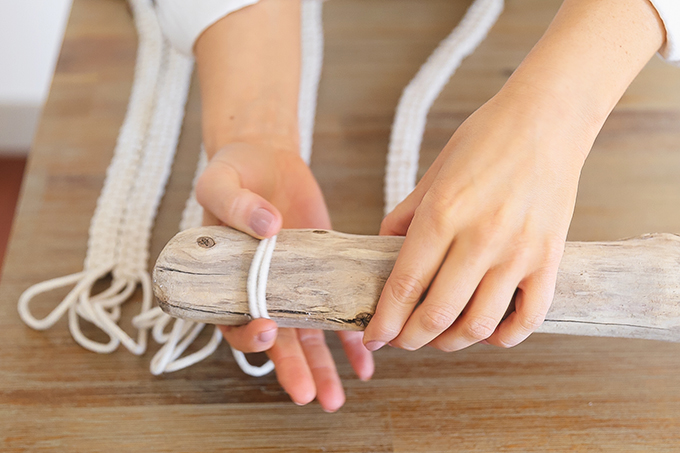
8. Drill 2 holes through the driftwood, a minimum of 3 inches away from each edge. This is what you’ll thread the macrame cord through to hang the piece.
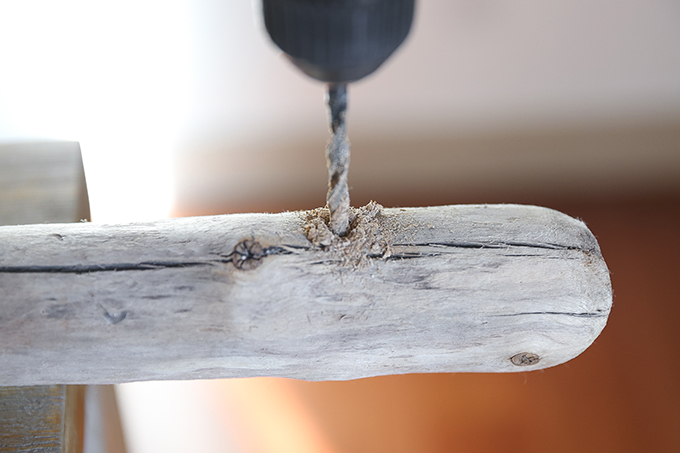
9. Cut your macrame cord roughly 6″ longer than the length of your driftwood.
10. On one side, feed the cord down through the hole and tied a knot on the underside.
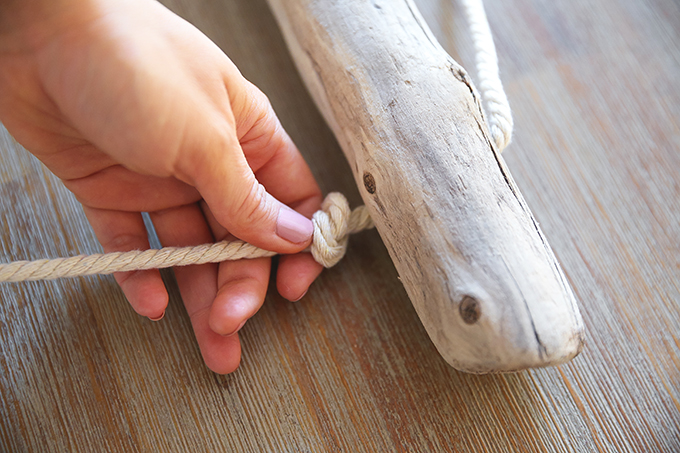
11. Estimate the length of cord required to hang the piece, then tie a knot on the other side, making sure to leave extra cord.
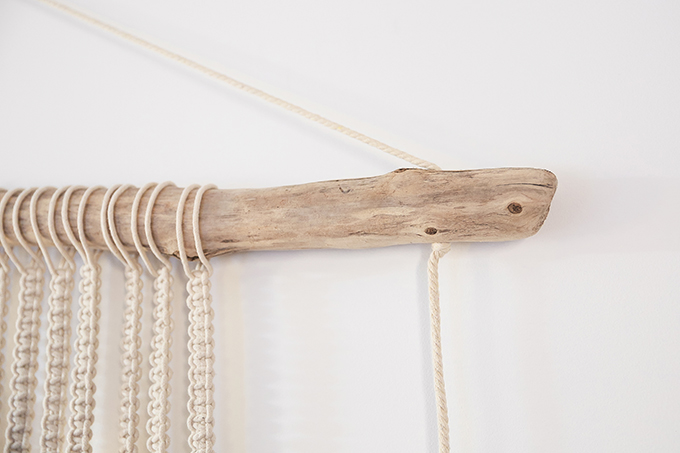
12. Drill your mounting screw into the wall (make sure to drill into a stud or use a wall plug if your piece is heavy) to install your hanging. The weight of the materials will cause the hanging cord to drop, which may make it too long. Shorten it by removing the cord knot at one end and feeding more of the cord through the hole, re-knotting and re-hanging as needed.
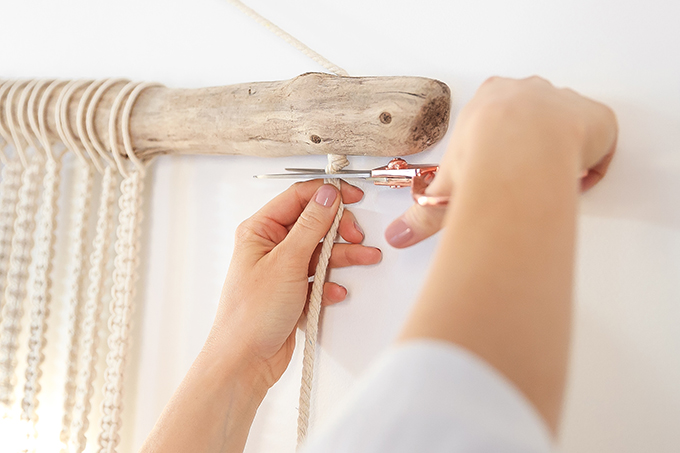
13. Once you’re happy with the way the piece was hanging on the wall, trim any excess cord from either side of the knot.
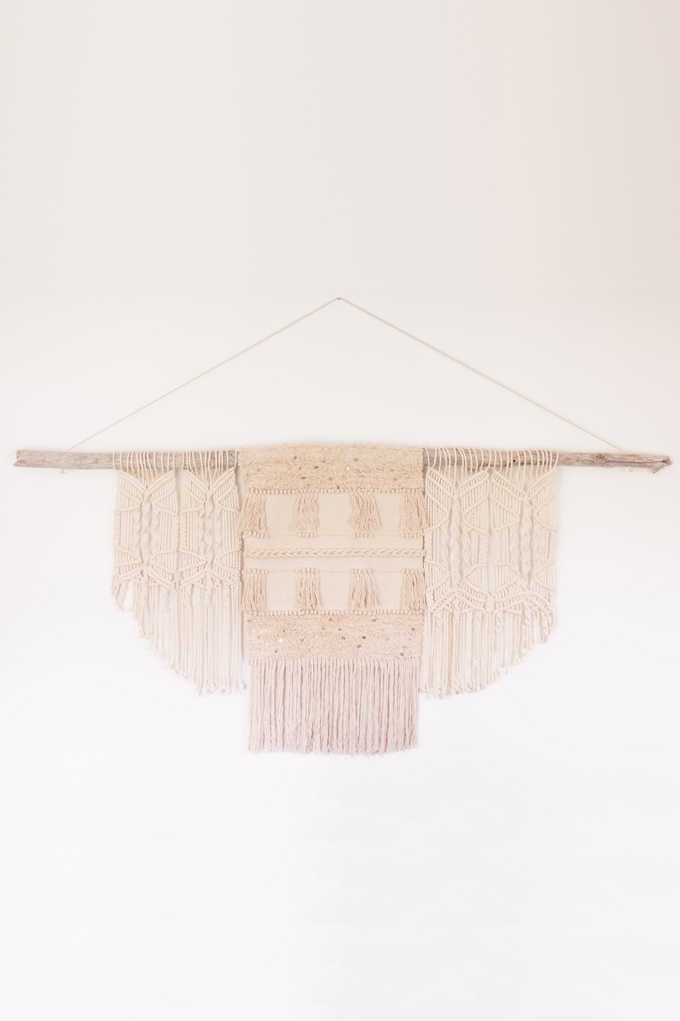
And volia — you created a 7′ Modern Driftwood Macrame Wall Hanging for less than $70!
MORE DIY & DWELL CONTENT
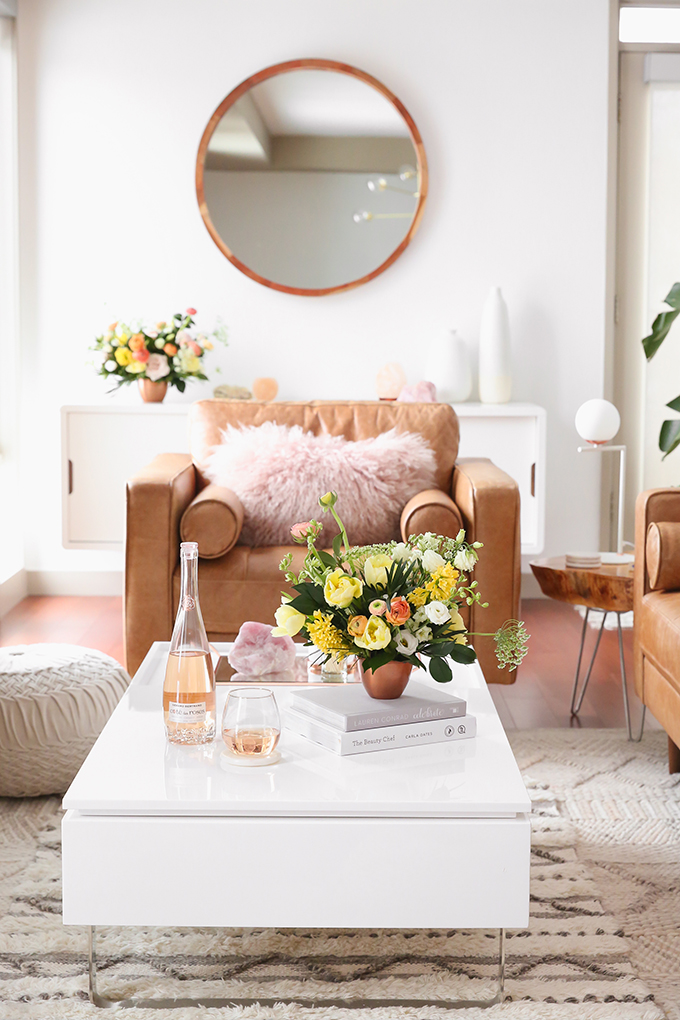
DIY | Large Driftwood Macrame Wall Hanging
Space Refresh | Living Room Reveal
DIY | Natural Tree Stump Side Table
Space Refresh | Paint Transformation
Space Refresh | Dining Room, Bar & Kitchen Reveal
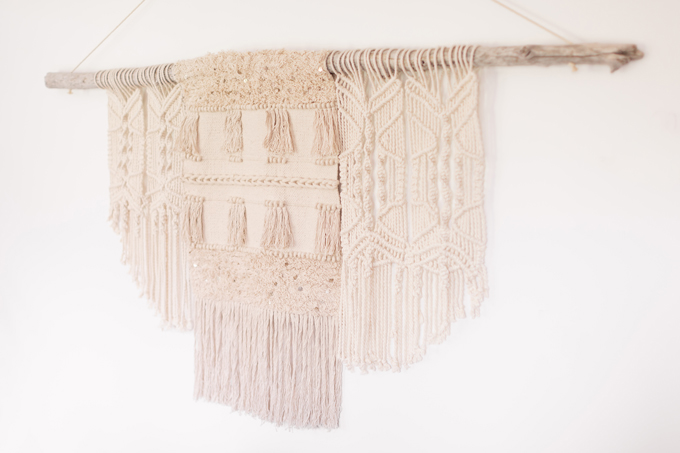
Have I inspired you to give this DIY Modern Driftwood Macrame Wall Hanging a go? If so, I’d love to see photos — feel free to share, tag me, use the #justinecelinaDIYs hashtag, or shoot me a DM or an email so I can see your beautiful creations. As always, I’m happy to answers any questions you have along the way! If you’re looking for even more DIY inspiration for your home or wardrobe, I also have a DIY Pinterest Board full of ideas!
For now I’ve hung her in our hallway, but she’ll likely retire to the master suite (after we paint, of course!). I’m so excited to share the next rooms in our SPACE REFRESH series with you over the coming months — both the Entrance Way and Main Bathroom are nearly complete! They’ve come together organically over time and I’ve loved the process of just puttering away on them. The apartment is always a work in progress and you can catch a sneak peek of what we’re working on long before it hits the blog on my Instagram Stories HOME Highlight. Enjoying the process is key to keep these long term projects going — but I can’t wait to share them with you when they finally come to fruition! Thanks for stopping by today, boho babes — wishing you the best of luck with your projects.
Disclaimer: This post is not sponsored and contains my genuine thoughts, ideas and recommendations. JustineCelina uses affiliate and referral links, which allow me to receive a small commission when you make a purchase through one of my links. Thank you for supporting the brands and businesses that support JustineCelina!



9 Comments
[…] you’re interested in some more photos from our trip, check out my DIY | Modern Driftwood Macrame Wall Hanging post (I foraged a piece of driftwood from the dreamy beach in front infront of our cabin to make my […]
[…] several macrame pieces on hand, take the whole idea for this rustic decor project and make you […]
[…] metal base accent cabinet (containing my sunglass collection, among other things!) contrasted by a DIY Driftwood Macrame Wall Hanging, created with wood foraged from Alberta’s Barrier Lake. I styled this area with familiar […]
[…] that coordinated with our original decor (that you’re used to seeing in this space) and this one, which used to live in our Hallway! Since I wanted to keep our Living Room lighter, brighter and […]
[…] 19. Driftwood Wall Hanging […]
[…] 21. Macrame Wall Hanging […]
[…] Learn how to create this modern driftwood macrame wall hanging for just $66 and a few hours from start to finish, including installation with step-by-step, visual instructions! Full tutorial on justinecelina. […]
[…] Macrame Wall Hanging […]
[…] Driftwood Wall Hanging […]